Transform your walls with this easy DIY geometric wallpaper guide. Follow our step-by-step instructions and create a stunning feature wall in no time!
Looking to add some personality to your walls? Geometric wallpaper is a great way to make a statement in any room. With this easy DIY guide, you can create a stunning feature wall that will impress your guests and transform your space. Follow our step-by-step instructions to get started.
Gather Your Materials.
Before you begin, make sure you have all the necessary materials. You will need wallpaper, wallpaper paste, a wallpaper brush, a ruler, a pencil, a sharp utility knife, and a cutting mat. You may also want to have a level and a tape measure on hand to ensure your lines are straight and even. Once you have everything you need, you’re ready to start creating your geometric masterpiece!
Measure and Mark Your Wall.
The first step in creating your DIY geometric wallpaper is to measure and mark your wall. Use a tape measure to determine the height and width of the wall you want to cover. Then, use a pencil and ruler to mark out your geometric pattern. You can create any pattern you like, but popular options include triangles, diamonds, and hexagons. Make sure your lines are straight and even, as this will make the wallpaper application process much easier. Once you have your pattern marked out, you’re ready to move on to the next step.
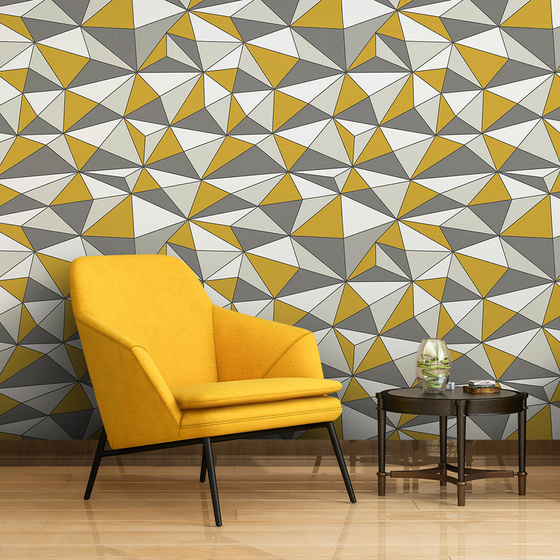
Create Your Geometric Pattern.
The first step in creating your DIY geometric wallpaper is to decide on your pattern. You can choose from a variety of shapes, including triangles, diamonds, and hexagons. Use a pencil and ruler to mark out your pattern on the wall, making sure your lines are straight and even. You can also use stencils or templates to create a more intricate design. Once you have your pattern marked out, you’re ready to move on to the next step.
Cut and Apply Your Wallpaper.
Once you have your pattern marked out on the wall, it’s time to cut and apply your wallpaper. Measure the height and width of your wall and cut your wallpaper to size, leaving a little extra on each side to ensure a perfect fit. Apply wallpaper paste to the back of your wallpaper and carefully line it up with your pattern on the wall. Smooth out any bubbles or wrinkles with a wallpaper brush or squeegee. Repeat this process until your entire pattern is covered with wallpaper. Allow the wallpaper to dry completely before enjoying your new feature wall!
Smooth Out Any Bubbles or Wrinkles.
After applying your wallpaper to the wall, it’s important to smooth out any bubbles or wrinkles to ensure a seamless finish. Use a wallpaper brush or squeegee to gently push out any air pockets or creases. Start from the center of the wallpaper and work your way outwards, using even pressure to avoid creating new wrinkles. Take your time and be patient, as this step can make a big difference in the final result of your DIY geometric wallpaper project.