How to Draw Puzzle Pieces. Playing a jigsaw puzzle on a quiet afternoon sure is a great pastime! Jigsaw puzzles can contain various images and come in different sizes and pieces, making them perfect for all ages and skill levels.
Also, check our Unicorn Coloring Pages.
As fun as putting a good jigsaw puzzle together can be, learning how to draw jigsaw pieces can be a lot of fun so that you can design your jigsaw puzzles!
If you want to design your jigsaw puzzle, you’ve come to the right place! This step-by-step, 6-step puzzle drawing guide will give you the last piece to learn how to create your jigsaw puzzle picture.
How to Draw Puzzle Pieces
Step 1
In this first step of our guide to drawing puzzle pieces, we’ll start with the base of the square puzzle.
Drawing the puzzle pieces may take some getting used to as they have quite a peculiar shape.
Outline the smooth edges of the puzzle pieces with some curved lines, making sure to pull out some rounded shapes.
The reference image shows you what we mean, so do your best to replicate it.
You can also add another layer of straight-edge puzzle pieces to form a whole puzzle. Once you’re done, we can move on to step 2.
Step 2
In this second part of drawing the puzzle pieces, you’ll repeat what you did in the first step, only this time, and it’s for the top half of the puzzle.
Use the reference image to draw the top half of the puzzle. Remember where rounded indentations extend in or out of the puzzle.
How you place them will play a role when we draw some individual pieces inside the puzzle in future steps. We’ll start with this as we move to step three of the guide!
Step 3
You’ve completed your puzzle outline, and now we can start drawing some individual pieces in this step of our puzzle piece drawing guide.
Using the reference image as an example, we draw the bottom layer.
To make it easier, you can use a light-colored pencil to draw a squiggly line at the bottom of the puzzle to create an outline for this row of pieces.
Once you have that, you can use the pen to draw the round indentations and the protruding parts, as shown in the reference image.
If you used a pencil line as a guide, you could delete it now as you no longer need it.
Step 4
As you continue drawing the puzzle pieces, you can now draw the next layer of pieces.
This requires you to repeat what you did in Step 3 of the guide.
The difference is that the indentation was in the middle last time with two protruding parts on either side and this time, it will be the opposite.
This means that the two pieces on the outside edges have knockout holes on top, while the one in the middle has a protruding piece.
Then you can add the final layers in the next step of the guide.
Step 5
In this fifth step of our puzzle piece drawing guide, you’ll finish the outlines for the remaining rows of puzzle pieces.
To do this, you can repeat what you did in the previous two steps to complete these levels.
Once you’ve drawn the final pieces of this puzzle, you’re ready for the final step of the tutorial!
Before you continue, you can also complete this puzzle. A fun idea would be to choose a picture and paint it on the front of this puzzle to make it look like a real puzzle.
Step 6
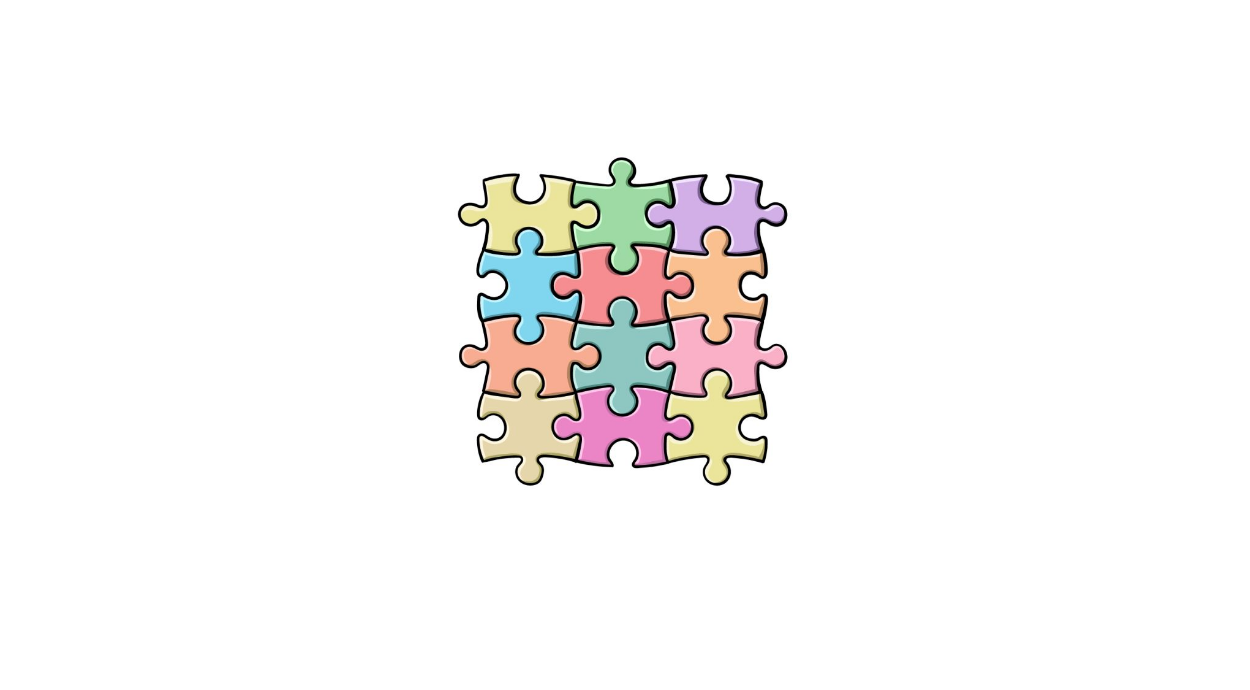
Now you have come to the final stage of drawing puzzle pieces and can finish with some colors.
In our reference image, we went for some bright and vibrant colors and used a unique color for each piece.
You could take a similar approach and use all your favorite colors for the pieces of this puzzle!
If you have drawn an image on the puzzle pieces, make sure you use colors that are appropriate for the image you have chosen.
This is a fun step where you can show off your creativity, so make sure you have fun while you complete it!
Your Puzzle Pieces Drawing is Finished!